Are you ready to jump right in?
#1 Getting ready

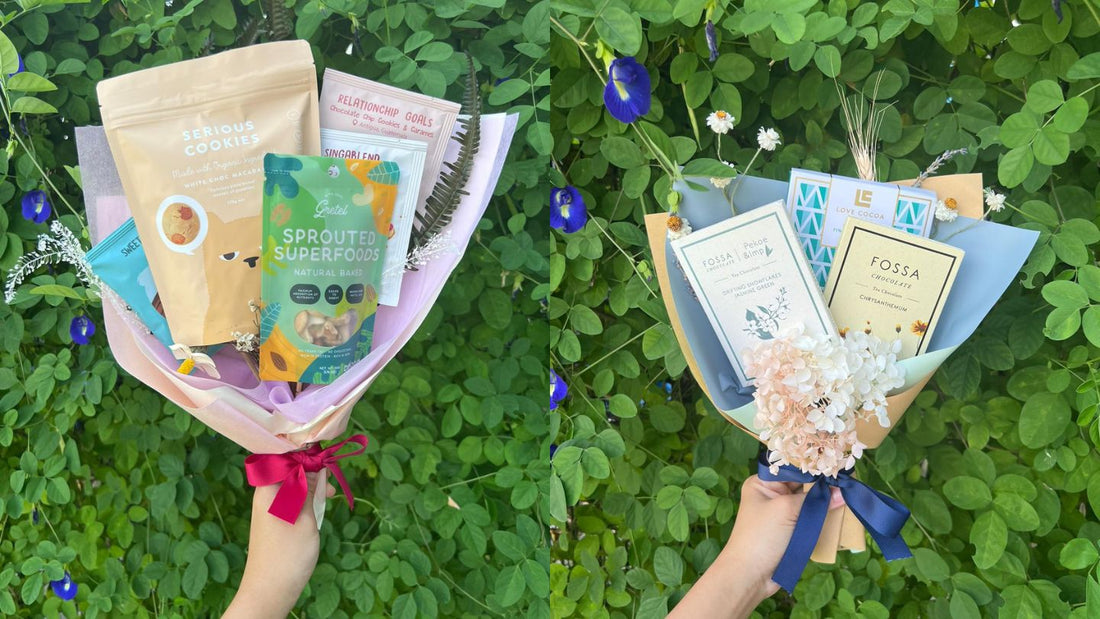
To make your snack bouquet, firstly, we need to gather all the necessary ingredients & tools. Below is what you need.
Pick 3 - 4 snack items:
- If it’s your first time DIY anything, it’s best to start with smaller sized & light items. For example, in this guide, use a single-served Sweet & Salty Popcorn packet from Serious Popcorn, a bar of Creamy Milk Coffee Chocolate from Krakakoa, and a Drip Coffee sachet from Hook Coffee.
- If you want to go for the intermediate, advanced, or expert level of difficulty, simply increase the number of items you plan to include in your snack bouquet.
- Think about your recipient too when you plan your snack bouquet too. If they prefer healthy snacks, pick out healthy options to feature in your bouquet.
-
At GiftGood, we have a great selection of healthy snacks, halal-certified snacks, and snacks that are suitable for vegans and vegetarians. Some flavour-packed delights you can consider to include in your DIY snack bouquet include:
- Veggie Chips from Confetti Snacks
- Brownie Crisp from Dan's Bites
- Crispy Pops and Crabsticks from Kelly Snacks
- Chocolate Bar from Marou Chocolate
- Oat Milk Chocolate from Hip Chocolate
- Tea Box from OFFBLAK
Bamboo sticks:
- Match the quantity with the number of snack packets you plan to include in your snack bouquet.
- Ideally, you should aim to use bamboo sticks that are approximately 30cm in length. If the sticks are too short, it will be hard for you to handle later on.
- If you don’t have bamboo sticks readily available at home, you can replace them with chopsticks, satay sticks, bamboo straws, or metal straws.
Tapes:
Make sure you have some strong tape ready. We use kraft tape in our guide, but sturdy scotch tape is great too.
Twine:
Twine is for securing the “stems” together. You can use other types of strings, rubber bands, or potentially embroidery threads.
Wrapping Papers in two colours:
In our guide, we use brown paper for the inner layer and a red honeycomb wrapper for the outer layer. You can use gift wrapping papers leftover from Christmas, normal A4 paper, newspaper, magazines, wrapping papers leftover from moving houses, etc. Stay resourceful and eco-friendly as much as you can.
Ribbon:
For the final touch. You can find ribbons in various colours to suit your needs here, or you can consider making your own “ribbons” by cutting stripes of clothes from your old clothes, tote bags, scarves, etc.
#2 Create your snack “flower” stems

Once you have all the ingredients ready, it’s time to start making your very first petite snack bouquet. In this step, we will create the snack “flower” stems so that you can find your grip and arrange your bouquet. It’s very straightforward.
- Work on the backside of each of your snack packet
- Use tape to secure the bamboo stick to your snack packet
- Apply the same step for all snack packets you have
#3 Arrange your mini snack bouquet
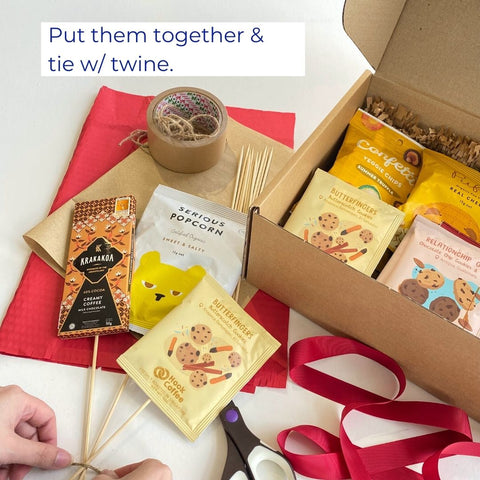
Once your snack "flower" stems are ready, simply lay them on the table and arrange them. It’s hard to hold everything up when arranging your snack bouquet if you are new. So use the table for support so you can have more control with your grips.
Once you’re done, use twine to secure the petite snack bouquet you’ve arranged.
#4 Wrapping

Start wrapping with the inner layer.
- Fold the paper to create the mountain shape at the top
- Position your bouquet in the middle of the wrapping paper
- Fold the paper in from left, and then right, and make sure to maintain your grips throughout so the bouquet doesn’t move
- You can open up and apply the same steps to adjust until you’re happy with the look and feel
- Once you’re happy, use twine to secure the wrapping position
Apply the same steps for the outer layer.
- Try to use wrappers in contrasting colors to make the color pop and help your snack bouquet stand out more
#5 Tie a ribbon

Add final touches by tying a ribbon. And that’s it, your mini snack bouquet is ready to melt someone's heart!
Give it a try and don’t be afraid to re-do and re-adjust till you get the look you want. Have fun and enjoy the process. Don’t forget to tag us your creations on Instagram at @shopgiftgood 💚!
Get started easily in Singapore: All the snacks you need to DIY a Snack Bouquet with free same-day delivery
With just a touch of extra effort, sometimes a good gift can easily transform into an awe-inspiring "Are you serious?!" moment. Stock up on all the necessary DIY tools at Spotlight, or PaperMarket, then head over to Good Market and treat yourself to the finest selection of snacks and drinks, perfect for crafting a delightful and fun snack bouquet for your loved ones.

That’s it for our guide.
If you like our DIY snack bouquet guide and want to see more content like this, subscribe to our newsletter below or follow us on Instagram @shopgiftgood. And don’t forget to share this guide with your friends and family who might enjoy it too!


